 But before that, let me recommend the beta version of .NET Reflector, which integrates with Visual Studio 2010 and allow a very good debugging of the Silverlight client.
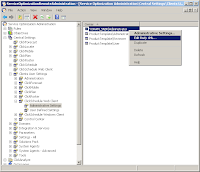
 Step 1: Switch Gantt in the Settings
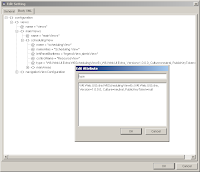
We will instruct the client to load the Gantt from a new assembly, which we will create in the next step, by editing the Body XML of the Administrative Settings of the client. Then we will verify that we have under the root configuration, views node with its name attribute. Under that, mainViews node and its name attribute. Under that, schedulingView node and its name attribute. We will override the default Gantt by adding type attribute with the following string: W6.Web.UI.Extra.W6SchedulingViewEx,W6.Web.UI.Extra, Version=1.0.0.0, Culture=neutral, PublicKeyToken=null
 Step 2: Enhanced Gantt
Rename the file W6.Web.UI.xap to W6.Web.UI.zip and extract the files out. Keep them in a sub-folder to reference them later. In Visual Studio 2010, create new C# Silverlight Class Library project, name it W6.Web.UI.Extra and add reference to W6.Web.Controls.dll and W6.Web.UI.dll, rename the existing class to W6SchedulingViewEx, and paste the following code:
using System.Windows.Controls;
using System.Windows.Shapes;
using System.Windows.Media;
using W6.Web.UI.View;
using W6.Web.UI.GanttChart;

namespace W6.Web.UI.Extra
{
  public class W6SchedulingViewEx : W6SchedulingView
  {
    public override void Refresh()
    {
      base.Refresh();

      Rectangle r = new Rectangle();
      r.Fill = new SolidColorBrush(Colors.Green);
      r.VerticalAlignment =
        System.Windows.VerticalAlignment.Top;
      r.HorizontalAlignment =
        System.Windows.HorizontalAlignment.Left;
      r.Height = this.ResourceGantt.RowHeight;

      // from the begining of the loaded Gantt
      double minutesToStart = 720;
      // from the start of the rectangle
      double minutesToFinish = 60.0;
      // zero based index of the engineer
      double engineer = 4;

      r.Width = minutesToFinish
        * this.ResourceGantt.PixelPerMinute;
      r.Margin = new System.Windows.Thickness(
        minutesToStart
          * this.ResourceGantt.PixelPerMinute,
        engineer * this.ResourceGantt.RowHeight,
        -1.0, 0.0);

      ((Grid)((W6CalendarLayer)this.ResourceGantt
        .GanttChartLayers[0]
        ).Content).Children.Add(r);
    }
  }
}
Build the project and copy the DLL onto the W6.Web.UI.zip file. Edit the extracted file AppManifest.xaml and add new assembly part:
<AssemblyPart
  x:Name="W6.Web.UI.Extra"
  Source="W6.Web.UI.Extra.dll" />
Drag the AppManifest.xaml file onto the W6.Web.UI.zip file, Choose to replace the existing one, and rename the ZIP file back to W6.Web.UI.xap and open the client, using: http://localhost/ClickScheduleWebClient/default.aspx
In the client, select the Refresh button and a green rectangle should appear on the Gantt's lowest layer, the calendar layer. From here, you can enhance the Gantt with a lot of flexibility.
